Crop Mark & Bleed Area in Illustrator
Posted: Fri Sep 26, 2008 9:29 pm
Hi everyone, today I want to share an important part of Illustrator or pre-printing. Those who are involve with printers or set output for printing their design should be careful of these few terms and their usage.
Below I have shown 2 scenarios which usually happen in printing house while they cut the paper.
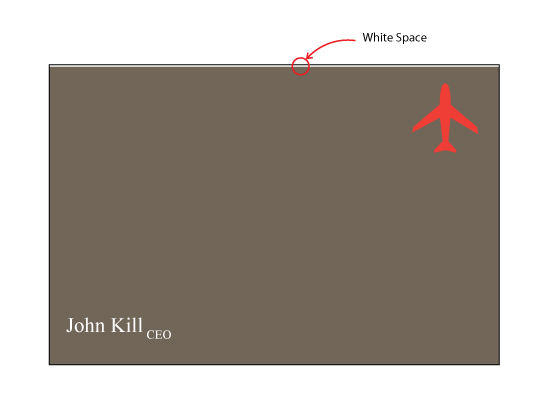
Scenario 1: White space at the top of the business card.
Scenario 2: Text cropped at the right hand side.
Scenario 1:

Scenario 2:

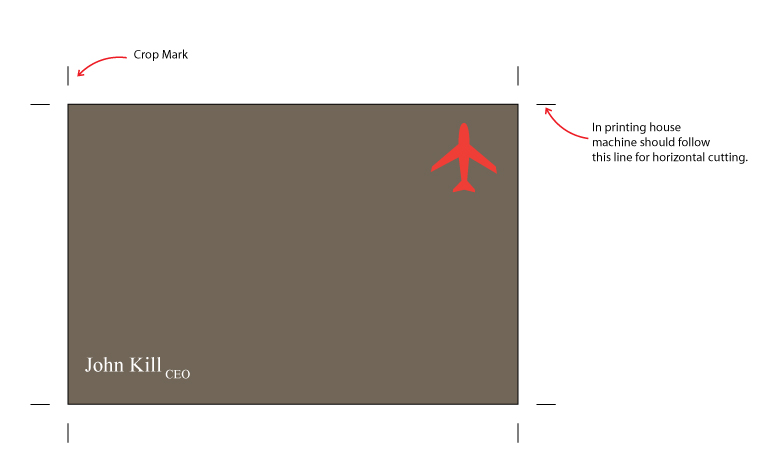
When we (or printing house designer/stuff) prepare our design for printing, we have to set the crop mark (Illustrator: Menu bar > Object > Crop Area > Make) first. Along with this mark machine will flush cut the printed paper for actual output. Sometimes machine can’t be so accurate to maintain the crop mark.
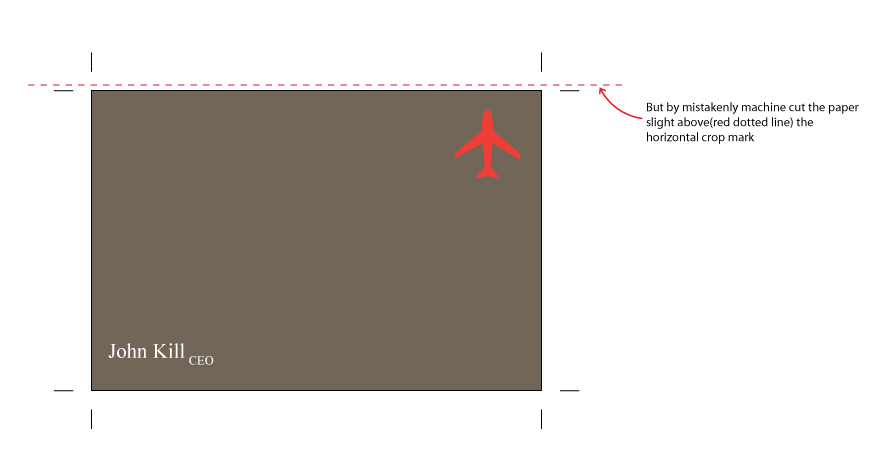
From the above images we can see how machine do the mistakes and give us an unexpected white line.
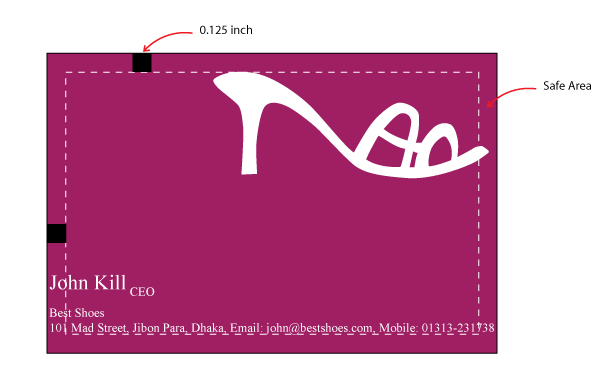
To avoid this or to be safe we can increase the background from all side, which is actually bleed area. And the area size is minimum 0.125 inch from the actual border.

So now if the machine does the same mistake again by any chance it can’t surprise us.
Now think reversely. Ahan ....its really dangerous (Scenario 2). Yes, machine may cut the text or important objects from your design while flush cut. So it is safe to keep your important texts or objects 0.125 inch inside from border area. Below I have showed with pictures.
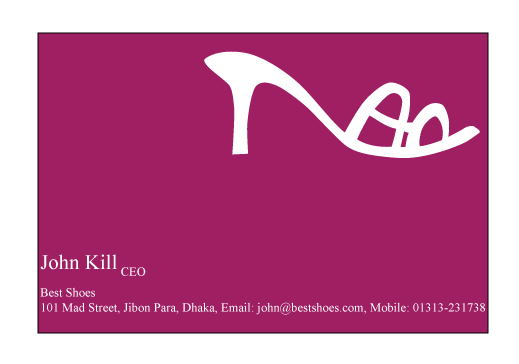
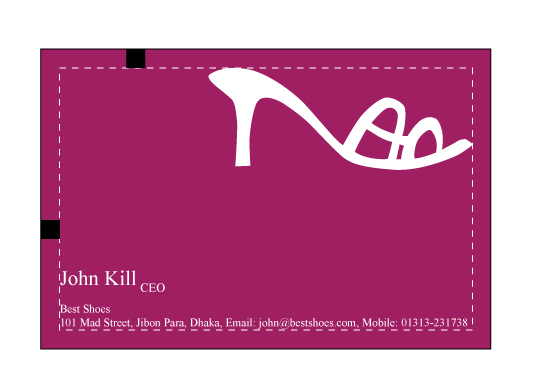
Actual Design
Final Output
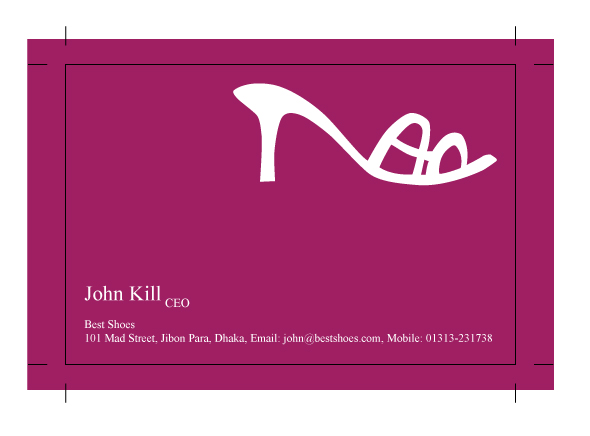
Final look with bleed and safe area. Whatever the machines behavior your design is safe now.
So look at quickly the definitions of two terms:
Crop /Trim Mark: Vertical or horizontal lines placed outside the images areas of a press sheet to indicate where the paper should be cut.
Bleed: The portion of an image that extends beyond the trim area of a page.
Here is another example with graphics

with crop mark and bleed area

final output
Comments or Extended suggestions are most welcome.
Definitions are taken from the book: Graphic Designer's Print and Color Handbook
(c) All the images of this tutorial are copyright by smasif, 2008
Below I have shown 2 scenarios which usually happen in printing house while they cut the paper.
Scenario 1: White space at the top of the business card.
Scenario 2: Text cropped at the right hand side.
Scenario 1:
Scenario 2:
When we (or printing house designer/stuff) prepare our design for printing, we have to set the crop mark (Illustrator: Menu bar > Object > Crop Area > Make) first. Along with this mark machine will flush cut the printed paper for actual output. Sometimes machine can’t be so accurate to maintain the crop mark.
From the above images we can see how machine do the mistakes and give us an unexpected white line.
To avoid this or to be safe we can increase the background from all side, which is actually bleed area. And the area size is minimum 0.125 inch from the actual border.
So now if the machine does the same mistake again by any chance it can’t surprise us.
Now think reversely. Ahan
Actual Design
Final Output
Final look with bleed and safe area. Whatever the machines behavior your design is safe now.
So look at quickly the definitions of two terms:
Crop /Trim Mark: Vertical or horizontal lines placed outside the images areas of a press sheet to indicate where the paper should be cut.
Bleed: The portion of an image that extends beyond the trim area of a page.
Here is another example with graphics
with crop mark and bleed area
final output
Comments or Extended suggestions are most welcome.
Definitions are taken from the book: Graphic Designer's Print and Color Handbook
(c) All the images of this tutorial are copyright by smasif, 2008